Being able to record design videos on your PC can be useful in a number of ways. For starters you could save design tutorials or other guides related to it, or conversely you could create design videos of your own.
If you’d like to do any of that however – you should start by trying out Movavi Screen Capture Studio software. It is perfect for recording any kind of design videos because it will let you record videos from various sources. On top of that it has its very own built-in editor that you can use to compile and edit videos after you capture them.
The first thing that you should do though is explore the options that you can use to capture video on PC using Movavi Screen Capture Studio:
Recording videos from a PC screen
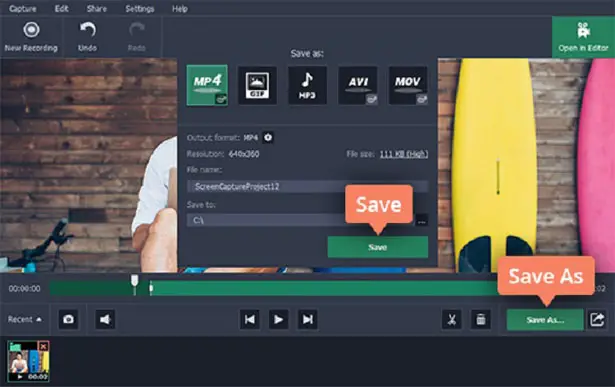
As you may have surmised from its name, this software will let you record videos from your screen – which you can use to save design tutorials or other online streaming videos. To open up the screen recorder you should open the software then select “Record screen” in the launch window.
It is easy to set up the screen recording and you can start by using your mouse cursor to draw a frame over the area that you want to record. After that you can set up other recording parameters, and select the audio source, set the volume levels, adjust the frame rate, or set it to capture keyboard and mouse actions.
When you’re ready press “REC” to start recording and then hit “Stop” when you’re done.
Recording videos from external devices
To record videos from an external device such as a webcam, TV tuner, or VHS player that is connected to your PC, you should launch Movavi Screen Capture Studio and select “Edit video”, then click on the “Record Video” button in the editor’s interface. In the capture app you will then be able to set the “Video capture device” and adjust the other recording parameters below it.
After everything is set up you just need to click “Start Capture” to begin recording then “Stop Capture” when it is done. It should be noted that the same steps can be used to import videos from AVCHD cameras, and if one is detected the videos that are on it will be listed and can be selected and loaded into the software.
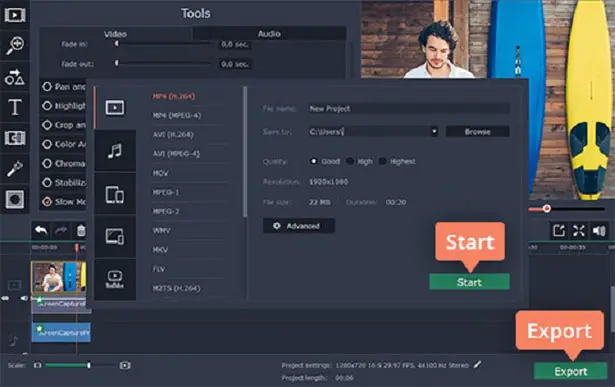
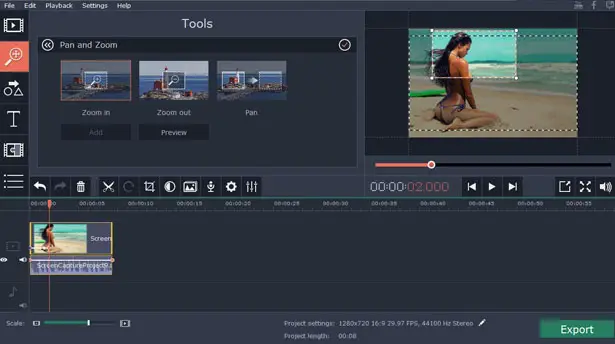
Irrespective of the method that you use to record the design video, when you’re done you’ll be able to open it in the built-in video editor. The features in the editor will let you compile, edit and improve the raw footage that you recorded.
This software is also equipped with some features that will give you the means to enhance the quality of your videos, merge clips together, trim out unnecessary parts, apply effects and filters, insert audio tracks, add text fields, and more. Suffice to say you can opt to create impressive design videos of your own, or fix, tweak and alter existing design tutorials that you may want to save.
Overall you should be starting to see just how easy it is to use Movavi Screen Capture Studio software, which is yet another advantage of using it. Because of its intuitive design, you won’t need much time to familiarize yourself with its features and capabilities, and can focus on using them to record the design videos that you want instead. All said and done there’s no better way to start than by trying it firsthand.